


Learn how to change garage door springs safely and correctly. Avoid common mistakes with this expert step-by-step guide.
When your garage door stops functioning correctly, worn-out or broken springs are often the root cause. Springs are essential for counterbalancing the door’s weight, allowing it to open and close with minimal effort. When they fail, your garage door can become heavy, unresponsive, and unsafe to operate.
Many homeowners search for “how to change garage door springs” in hopes of tackling the issue themselves. While it is possible to do so, the task demands a strong understanding of mechanics, proper safety precautions, and the right tools. Mistakes can lead to injury or damage to the garage door system.

This blog will guide you through the correct way to replace garage door springs, highlight the most frequent errors people make, and provide actionable tips to complete the task safely and efficiently. Whether you’re an experienced DIYer or a cautious homeowner exploring your options, our detailed walkthrough is designed with clarity, trustworthiness, and first-hand expertise.
Safety First: Why Caution Matters When Replacing Garage Door Springs
Before learning how to change garage door springs, it’s essential to understand the potential hazards associated with this task. Springs are under high tension and can snap if handled improperly. Eye protection, gloves, and sturdy tools are non-negotiable.
We recommend disconnecting the power to the garage door opener and ensuring the door is in the down position before beginning any work. These precautions help prevent the door from crashing down unexpectedly.
If you’re unsure at any point, it’s best to contact a professional. Spring replacement is not just about installing a new component — it’s about doing so without compromising your safety or the integrity of your garage door.
Types of Garage Door Springs: Know What You’re Working With
Understanding the type of spring system on your garage door is essential for proper maintenance, safe repairs, and efficient operation. Garage door springs are responsible for bearing the heavy weight of the door and allowing it to open and close smoothly. There are two main types of garage door springs, each working in a different way. Knowing the difference between them will help you make informed decisions if a repair or replacement is needed.
Torsion Springs
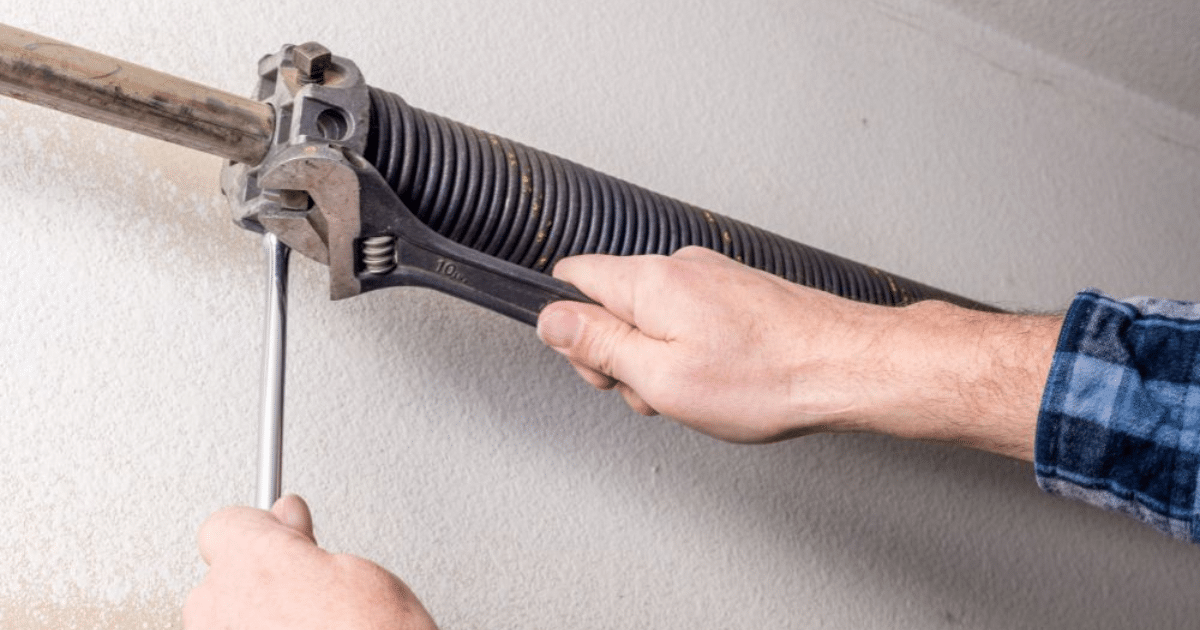
Torsion springs are typically installed horizontally above the garage door, mounted on a metal shaft. These springs use torque, or rotational force, to assist in lifting and lowering the door. When the door closes, the springs wind up and store energy. As the door opens, the springs unwind, helping to lift the door’s weight.
This type of spring is more common in modern garage door systems because it offers greater durability, better balance, and smoother operation compared to other spring types. Torsion springs are built to last longer and provide more consistent performance over time. However, because of the high tension involved, replacing or adjusting torsion springs can be dangerous without the proper tools and training. Professional help is often recommended for any major work involving these springs.
Extension Springs
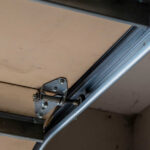
Extension springs are usually installed on both sides of the garage door, running along the horizontal tracks. These springs stretch out when the door is closed and contract as it opens. The stretching action creates the force needed to help lift the door.
Extension springs are generally less expensive and easier to install than torsion springs, which makes them more common in older or budget-friendly garage door setups. However, they tend to wear out more quickly and can be more dangerous if they snap, especially if safety cables are not in place. These cables are designed to prevent the springs from flying loose in the event of a break, which could otherwise cause injury or damage.
Why It’s Important to Identify Your Spring Type
Knowing which type of garage door spring your system uses is crucial when it comes time to perform maintenance or replace worn components. The tools, procedures, and safety precautions required are very different for torsion and extension springs. Attempting to replace the wrong type without proper knowledge can lead to serious injury or further damage to your door system.
Before starting any repair or replacement, take the time to inspect your garage door and identify the spring type. If you are unsure or uncomfortable handling it yourself, it is best to consult a trained professional who can ensure the job is done safely and correctly. Taking this step can save you time, reduce risk, and help maintain the reliability of your garage door for years to come.
Step-by-Step: How to Change Garage Door Springs the Right Way
Replacing garage door springs requires careful preparation, the right tools, and a strong focus on safety. Whether your door uses torsion or extension springs, following the correct procedure will help ensure a smooth and successful repair. Below are detailed instructions for changing both types of springs.
For Torsion Springs
- Disconnect the power and secure the door: Unplug the automatic garage door opener to prevent accidental activation. Make sure the garage door is completely closed. Clamp locking pliers or C-clamps onto the tracks just above the rollers to keep the door from moving.
- Mark the torsion shaft for alignment: Use a permanent marker to make reference marks on the torsion shaft. This helps you install the new springs in the correct position.
- Loosen the set screws: Insert a winding bar into one of the holes on the winding cone of the spring. Hold the bar securely in place before loosening the set screws with a wrench. Use a second winding bar to alternate positions and maintain control over the spring tension at all times.
- Unwind the springs: Carefully unwind the springs using the winding bars. Alternate the bars back and forth to gradually relieve the tension. Always keep a firm grip, and never remove your hand from the bar currently in use.
- Remove the old springs: Once fully unwound, slide the old springs off the torsion bar. Remove any additional hardware, such as bearing plates or cable drums, if necessary.
- Install the new springs: Slide the new torsion springs onto the torsion bar, placing them in the same orientation as the old ones. Reinstall any removed hardware.
- Wind the new springs: Using the winding bars, wind each spring the correct number of turns based on the manufacturer’s instructions. Be consistent with both sides to maintain even tension.
- Tighten the set screws: Once the springs are wound to the correct tension, tighten the set screws securely on each winding cone. Double-check that all bolts, screws, and fasteners are tight.
- Test the door manually: Remove the clamps or pliers from the tracks. Carefully lift the door by hand to check for smooth and balanced movement. The door should stay open halfway without assistance. Once balanced, reconnect the opener.
For Extension Springs
- Disconnect power and secure the door: Unplug the garage door opener. Open the door completely and clamp it in place using C-clamps or locking pliers on the tracks below the bottom rollers. This will prevent the door from falling while you work.
- Detach safety cables and springs: Carefully remove the safety cables running through the springs. Unhook the old extension springs from the eye bolts or brackets at each end.
- Install the new extension springs: Hook the new springs into place, making sure they are installed with equal tension on both sides. Attach the opposite ends to the same connection points used previously.
- Reattach safety cables: Thread the safety cables back through each spring and re-secure them properly. These cables are critical for safety in case the spring breaks in the future.
- Lubricate moving parts: Apply garage door lubricant to rollers, hinges, and the new springs to ensure quiet and smooth operation.
- Test the door manually: Remove the clamps from the tracks. Carefully lower and raise the door by hand to check for proper balance and tension. Once satisfied, plug the opener back in and test the door with the remote.
Important Safety Note: Working with garage door springs can be dangerous. If you are unsure about any part of the process or do not have the proper tools, it is highly recommended to hire a professional technician to perform the replacement.
Avoid These Common Mistakes When Replacing Garage Door Springs

Learning how to change garage door springs involves avoiding common pitfalls:
- Using incorrect spring types or sizes can unbalance the door, causing early wear.
- Over-tightening or under-tightening the springs will result in poor door movement.
- Skipping lubrication leads to unnecessary friction and noise.
- Ignoring safety procedures is the leading cause of DIY injuries.
- Not testing the balance of the door before reconnecting the opener can strain your system.
Being detail-oriented and methodical is key when dealing with high-tension components like garage door springs.
When to Call a Professional Instead of DIY
Sometimes, hiring a professional is the safer and more cost-effective option. If you’re unsure of your mechanical skills, lack the right tools, or notice additional problems with the door tracks or opener, it’s time to consult an expert.
Replacing garage door springs may seem simple in online tutorials, but even small mistakes can lead to major repairs. Professionals ensure the right parts are used, the tension is calibrated correctly, and the door functions smoothly and safely.
Frequently Asked Questions
How often should garage door springs be changed?
Garage door springs typically last between 7 to 12 years or about 10,000 cycles (one open and close). If you use your garage door frequently, its lifespan may be shorter. Regular inspections can help identify wear before it leads to failure.
How do I know if my garage door springs need to be replaced?
Common signs include difficulty opening the door, the door closing too quickly, visible gaps in the spring, or a loud bang when it breaks. If the opener strains or the door feels unusually heavy, the springs may be worn. A professional can confirm with a balance test.
How expensive is it to replace garage door springs?
Replacing garage door springs typically costs between $150 to $350, depending on the type of spring and labor rates. Torsion springs tend to be more expensive than extension springs. DIY replacement is possible but risky due to the high tension involved.
Should you replace both garage door springs at the same time?
Yes, it’s generally recommended to replace both springs at once. They wear out at the same rate, and a new spring paired with an old one can lead to imbalance or quicker failure. Replacing both also saves on labor costs and downtime.
Can you open a garage door with a broken spring?
You can sometimes open the door manually with great effort, but it’s not safe or recommended. Using the opener with a broken spring can damage the motor or cause the door to slam. It’s best to stop using the door and call a technician immediately.
Conclusion
Replacing garage door springs is a task that requires careful preparation, the right tools, and attention to safety. While it’s possible to complete the job as a DIY project, understanding the correct method is vital. Knowing how to change garage door springs properly helps avoid injuries and further damage to your garage system.
By following each step and using proper parts and tools, you can restore the function of your garage door. However, if you’re not confident, reaching out to a professional is always the best move.
Michigan Door is here to help with expert service and high-quality parts, whether you’re dealing with a basic issue or a complete spring replacement. Don’t compromise your safety or your home’s function. Let our experienced team step in when needed.
End Note
Michigan Door provides the highest quality service for your garage door needs. Whether you’re dealing with a broken garage door spring or looking for preventative garage door maintenance, we’re here to help. Our expert team delivers reliable, timely repairs across Michigan.
We specialize in a range of garage door repair services, from garage door opener issues to spring replacement, and serve clients through our local repair network. You can also find us throughout West Michigan and Southeast Michigan, including the Troy area.
Stay updated with garage door tips and best practices by visiting our blog. You can also follow us on Facebook, Instagram, Pinterest, and Yelp. Our reputation is built on verified service excellence, as reflected in our reviews on HomeAdvisor.
Need fast help? Use our contact page to schedule an appointment or speak directly with our service specialists today.
Michigan Door
444 W Maple Rd # B, Troy, MI 48084, United States
+12482734800
