
Discover expert guidance on adjusting a LiftMaster garage door opener, including speed, force, and limit settings. Learn how to fine-tune your opener for optimal performance and safety.
Garage door openers, especially LiftMaster models, are engineered to deliver smooth and reliable operation. However, over time, you might notice changes in the door’s movement or responsiveness. These changes often require recalibration of your opener’s speed, force, or limit settings to restore optimal functionality.

Improper settings can result in a garage door that opens too slowly, closes too forcefully, or fails to seal properly. Adjusting a LiftMaster garage door opener is not just about convenience; it also directly impacts the longevity of your opener system and the safety of your property. Fine-tuning these settings ensures that the door opens and closes correctly while avoiding unnecessary strain on the motor or hardware.
Whether you’re dealing with a newly installed system or revisiting an older unit that no longer operates as smoothly, understanding how to manage these settings is essential. This guide walks you through each adjustment step-by-step, helping homeowners, technicians, and DIY enthusiasts optimize their garage door performance.
How to Adjust Speed Settings on a LiftMaster Garage Door Opener
LiftMaster garage door openers are renowned for their reliability and advanced features. Some of the more recent smart-enabled models offer the ability to customize operational settings, including the speed at which your garage door opens and closes. While not every LiftMaster unit includes this capability, many newer models do allow for manual or app-based speed adjustments, giving homeowners more control over convenience and performance.
Understanding Speed Adjustment Capabilities
It’s essential first to determine whether your specific LiftMaster model supports speed adjustment. Older or basic models typically operate at a fixed speed that cannot be changed. However, if you own a smart garage door opener—particularly one that is compatible with the MyQ system—there’s a good chance that speed settings can be customized. These settings determine the speed at which the door opens or closes, which can impact both safety and the long-term durability of the equipment.
Adjusting Speed Settings via MyQ App or Control Panel
If your model supports speed customization, the most common way to access these settings is through the MyQ app or the wall-mounted control panel that came with your opener.
To adjust the speed through the MyQ app:
- Open the MyQ app on your smartphone or tablet.
- Select your garage door opener from the list of connected devices.
- Navigate to the “Settings” or “Device Settings” section.
- Look for an option labeled “Door Speed,” “Travel Speed,” or a similar term.
- Choose your desired speed setting. Options typically include “Standard” and “Fast,” though the exact terminology may vary by model.
If your model uses a wall-mounted control panel:
- Press the “Menu” or “Settings” button on the panel.
- Scroll through the available options to locate the speed adjustment setting.
- Use the navigation buttons to select and confirm your desired speed.
Considerations Before Making Changes
Although increasing the door speed can enhance convenience—especially if you’re in a hurry—it’s important to understand the trade-offs. Operating the door at a higher speed may place additional stress on the mechanical components, particularly if the door is not properly balanced or if the opener is older. In some cases, a faster speed might even accelerate wear and tear on parts like the motor, chain, or springs.
On the other hand, reducing the speed can be beneficial for older garage doors or when you want a smoother, quieter operation. Slower speeds are generally gentler on aging hardware, reducing the likelihood of breakdowns over time.
Final Tips
Before adjusting any settings, always refer to your LiftMaster model’s user manual to ensure compatibility and to follow the correct procedure. If you’re unsure whether your garage door is in optimal condition to handle speed changes, consider having it inspected by a professional technician. Making informed adjustments can help prolong the life of your garage door opener and ensure safe operation for years to come.
Adjusting a LiftMaster Garage Door Opener Force Settings for Safety and Performance
Force settings determine the amount of pressure the opener uses when lifting or lowering the door. Adjusting a LiftMaster garage door opener for force is essential to prevent damage and ensure safety, particularly if the door is heavier or lighter than average.
To adjust the force:
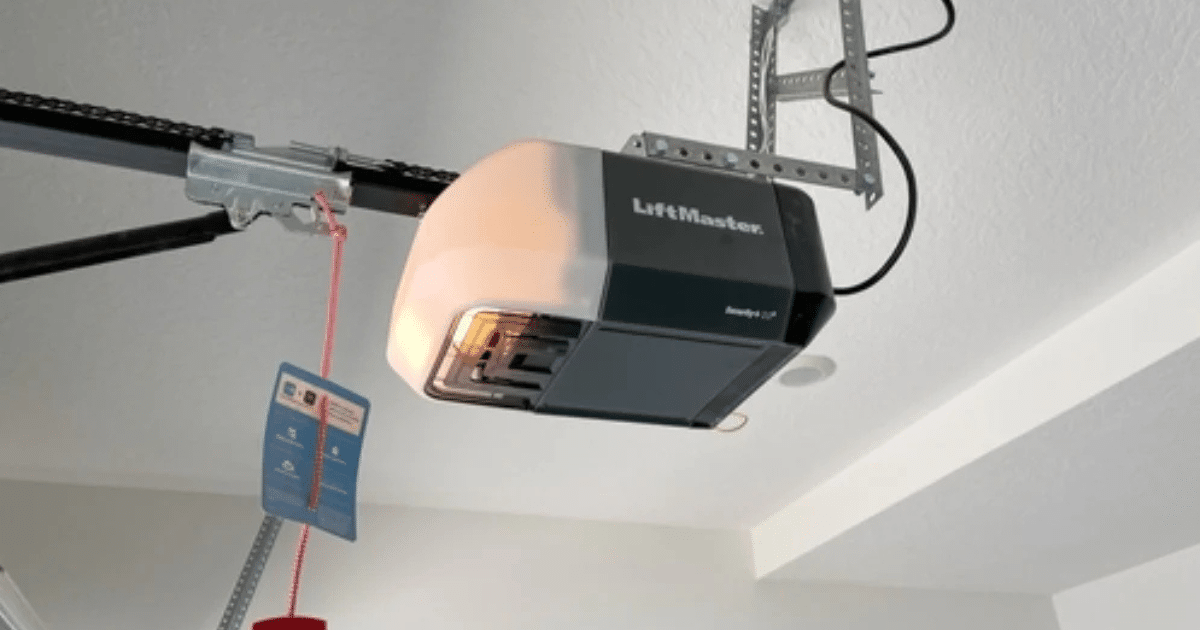
- Locate the adjustment dials on the back or side panel of the opener. They are usually labeled “Up Force” and “Down Force.”
- Turn the dial slightly clockwise to increase force or counterclockwise to decrease.
- Test the door after each adjustment. It should move smoothly and reverse immediately if it encounters resistance.
Overdoing the force can be dangerous and override safety sensors. If the door doesn’t reverse upon contact with an object, it could lead to injury or property damage. Always use the minimal force necessary for smooth operation.
Limit Settings: How to Adjust Door Travel Distance
Limit settings determine the distance your garage door travels when opening or closing. Incorrect limit settings can leave your door partially open or cause it to slam shut. Adjusting the limit setting on a LiftMaster garage door opener ensures your door closes fully without over-traveling.
Steps to adjust:
- Access the limit adjustment screws or electronic settings. These are marked as “Up Travel” and “Down Travel.”
- Turn the screw or use the digital control panel to increase or decrease travel distance. Typically, clockwise increases the travel and counterclockwise reduces it.
- Check the door movement each time you adjust. It should fully close with a tight seal and open without hitting the stop bolt.
Always make small adjustments and test after each change. This prevents overshooting the desired position and protects the opener motor.
When to Consider Professional Help for Adjusting a LiftMaster Garage Door Opener
While many homeowners can safely make basic adjustments, certain issues may require professional attention. If your garage door continues to malfunction after adjustment or makes unusual noises, it’s best to stop and seek expert service.
Common signs you should consult a pro:
- Repeated force limit trips
- The door opens unevenly
- Safety sensors malfunction
- Gear or chain issues
LiftMaster openers are complex machines, and improper adjustments can cause long-term damage. Professional garage door technicians possess the necessary tools and expertise to calibrate your system precisely and safely.
Frequently Asked Questions
How do I adjust my LiftMaster garage door opener?
You can adjust the travel limits and force. Locate the adjustment dials or screws on the opener unit (often labeled “up” and “down” for limits, and “open force” and “close force” for force). Use a flathead screwdriver to turn these in small increments and test after each adjustment.
How to adjust the force on a garage door opener with manual adjustment screws?
Find the two force adjustment screws—typically on the back or side of the opener motor housing. Turn the “up force” or “down force” screw clockwise to increase the force and counterclockwise to decrease it. Adjust in small steps and test the door after each change for safe operation.
How do I program my LiftMaster garage opener?
- Press and release the “Learn” button on the motor unit (it lights up for 30 seconds).
- Press the button on your remote that you want to program.
- When the opener light blinks or clicks, the programming is complete.
How to program a LiftMaster garage door opener without learn button?
If there’s no visible Learn button, your unit might be too old or use dip switches.
- Open the motor unit cover and locate the dip switches.
- Match the dip switch pattern with the switches inside your remote.
- Once matched, press the remote button to test the operation.
How do you reset a LiftMaster garage door opener?
- Unplug the opener for 1 minute and plug it back in.
- Press and hold the “Learn” button for about 6-10 seconds until the LED turns off. This erases all remote and keypad codes.
- Reprogram remotes and keypads as needed.
Conclusion
Adjusting a LiftMaster garage door opener can significantly enhance the safety, performance, and longevity of your system. Knowing how to calibrate speed, force, and limit settings empowers homeowners to maintain proper function without unnecessary service calls.
Regular maintenance checks and careful adjustments help avoid costly repairs and keep your opener in prime working condition. Whether you’re troubleshooting or fine-tuning, attention to these settings ensures a seamless garage door experience.
If your adjustments don’t resolve the issue, or if you’re unsure of the process, Michigan Door offers reliable, professional garage door services. From inspections to complete repairs, our team is here to ensure your opener performs the way it should.
End Note
Michigan Door is your trusted source for high-quality garage door openers and expert installation across Southeast Michigan. With a wide selection of models and features, our team helps you find an opener that fits both your needs and your budget. From our garage door opener page to our full lineup of garage door opener brands—including top names like LiftMaster, Raynor, and Genie—you’ll enjoy performance, reliability, and lasting peace of mind. Manufacturer warranties and professional support back our garage door opener installation and replacement services.
Michigan Door also provides comprehensive garage door repair, residential garage door solutions, and complete garage door services to ensure every aspect of your system functions flawlessly. If you’re experiencing issues with an existing unit, our specialists can quickly diagnose and resolve the problem with expert garage door opener repair. Serving homeowners across Southeast Michigan, including Troy, we are proud to be your go-to provider for local garage door repair. Explore more insights and tips on our blog.
Ready to get started? Contact us today or connect with us on Facebook, Instagram, Pinterest, Yelp, or HomeAdvisor to stay updated on the latest offers and projects. With Michigan Door, you’re not just getting a product—you’re investing in service, safety, and long-term value for your home.
Michigan Door
444 W Maple Rd # B, Troy, MI 48084, United States
+12482734800
